INSIGHT

- Home
- INSIGHT
- Spare Parts
- What Technicians Don’t Tell You: 6 Moves to Fixing Driver Units and Restoring Nailers
What Technicians Don’t Tell You: 6 Moves to Fixing Driver Units and Restoring Nailers
July 09,2025

Replacing a worn or damaged driver unit is one of the most effective ways to restore performance in pneumatic nailers and staplers. Whether you're dealing with frequent jams, shallow drive depth, or chipped driver blades, knowing how to safely remove and install a new driver assembly can save you both time and repair costs.
Below, you’ll find a clear, technician-approved walkthrough of the full replacement process—from disassembly and inspection to installation and reassembly—plus tips to help you avoid common mistakes and extend your tool’s lifespan after repair.
What is Driver Unit in Nailers and Staplers?
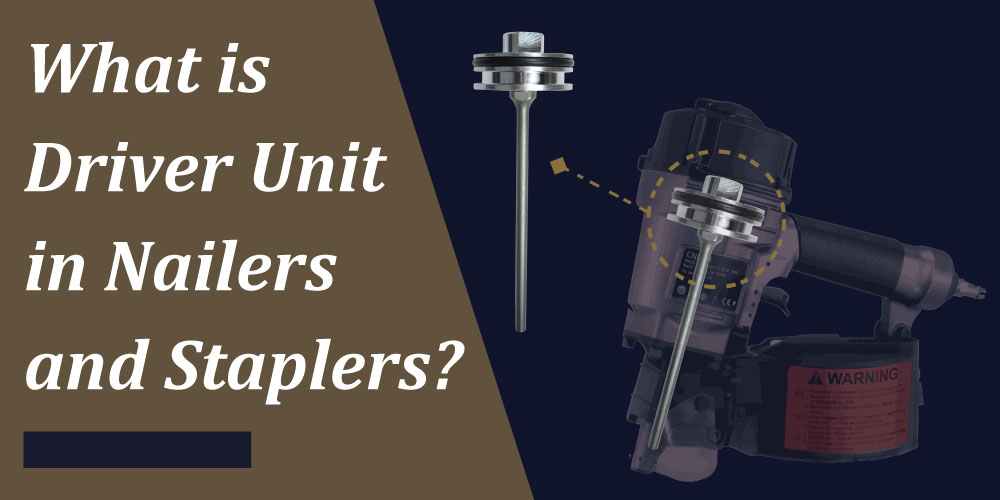 The Driver Unit is a critical component in nailers and staplers, responsible for delivering the impact force that drives fasteners into various materials. It typically consists of a driver assembly, which includes a piston and blade mechanism that cycles with each trigger pull. Over time, wear and tear on the driver unit can lead to misfires, jamming, or incomplete fastener penetration—clear signs that nailer repair may be needed.
【Extended reading: What is Driver Blade? Accomplished knowledge in original vs. aftermarket! 】
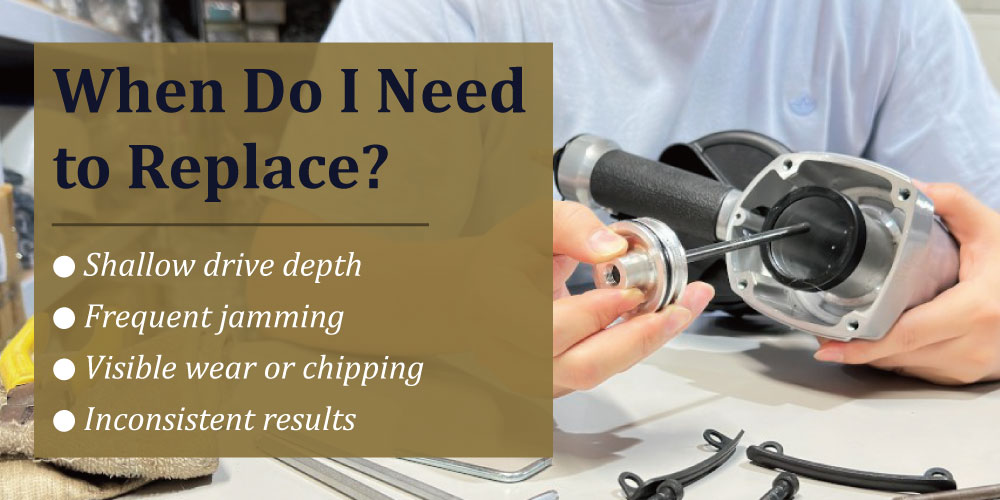
When Do I Need to Replace the Driver Unit in my Nailers and Staplers?
 If any of these symptoms occur regularly, it’s time to schedule a nailer repair or replace the driver unit to restore reliable function in your nailers and staplers.
Here are clear signs your driver unit may need replacement:
- Shallow drive depth
Fasteners don’t sink fully, leaving nails or staples proud of the surface—a classic sign of driver assembly wear. - Frequent jamming
A damaged or misaligned driver blade can cause nails or staples to jam during cycling. - Visible wear or chipping
If the tip of the driver blade is chipped, rounded, or uneven, it can no longer deliver consistent force. - Inconsistent results
Uneven fastener penetration, despite steady air pressure and material, suggests degraded impact performance.
If any of these symptoms occur regularly, it’s time to schedule a nailer repair or replace the driver unit to restore reliable function in your nailers and staplers.
【Extended reading: 5 Common Driver Unit Problems Every Air Nailer User Should Know】
Tools and Materials Needed for Replacement
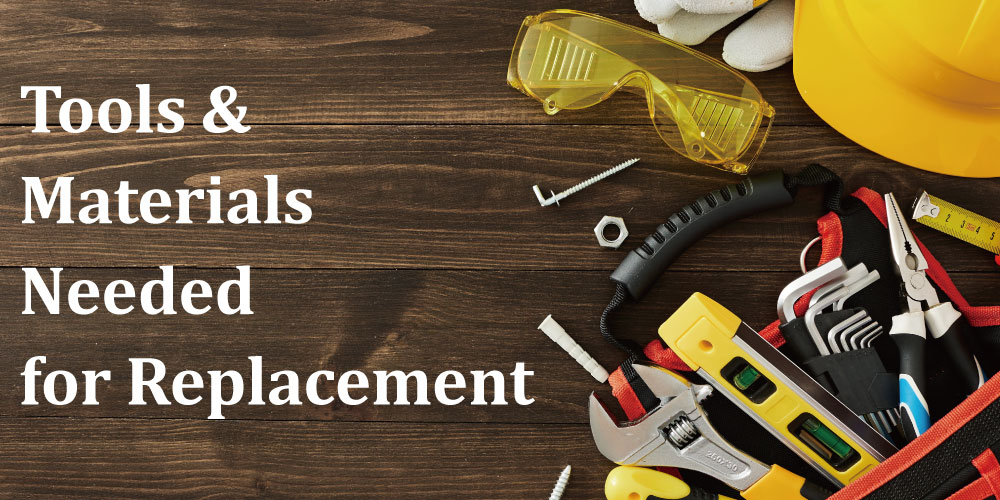 To replace the driver unit in your nailers and staplers, prepare the following tools and materials:
- Replacement driver assembly
Ensure compatibility with your tool model. - Hex keys / Allen wrenches
Used to remove nose bolts or front plate screws. - Phillips screwdriver
For loosening specific screws securing the driver guide (if applicable). - Needle-nose pliers
Helpful for pulling retaining pins or worn components. - Compressed air
Clean dust and debris before reassembly. - Pneumatic oil / light lubricant
Apply during reassembly to maintain smooth movement. - Soft cloth or mat
Protect parts and prevent fastener loss on the work surface.
Optional but helpful:
- Parts diagram or user manual
For identifying proper sequence and torque settings. - Protective gloves and eyewear
Essential when working with spring-loaded parts or disassembling under air pressure.
By preparing the correct tools, you’ll streamline the nailer repair process and avoid damaging sensitive components during driver unit replacement.
Step-by-Step Replacing Guide
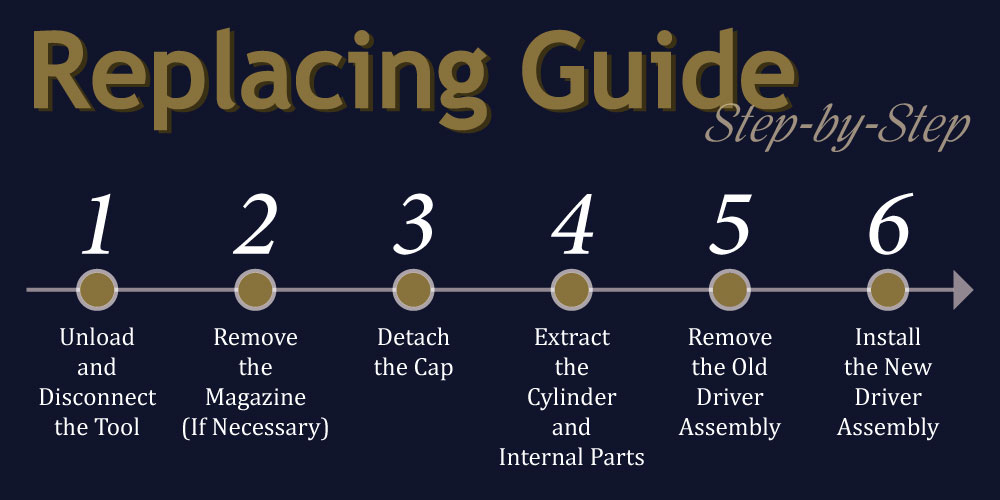 1. Unload and Disconnect the Tool
Begin by disconnecting the tool from the air supply. Open the magazine, remove all fasteners, and ensure the chamber is clear. This prevents accidental discharge and prepares the tool for disassembly.
2. Remove the Magazine (If Necessary)
For certain models, removing the magazine provides better access to internal components. Refer to your tool’s manual to determine if this step is required for your unit. Use appropriate tools to detach it carefully without damaging the frame.
3. Detach the Cap
Using an Allen wrench or screwdriver, unscrew the cap of the tool. This cap usually secures the internal air chamber and must be fully removed to access the driver assembly.
4. Extract the Cylinder and Internal Parts
Once the cap is removed, carefully lift out the cylinder. Inside is the driver assembly, made up of the piston and driver blade. Observe the orientation of parts—incorrect reassembly may cause misfiring or seal damage.
5. Remove the Old Driver Assembly
Slide the driver assembly out of the cylinder. Check for signs of wear such as bent blades, cracked pistons, or worn O-rings—these are common causes of misfeeds or air leakage in nailers and staplers.
6. Install the New Driver Assembly
Place the new driver assembly inside the cylinder, ensuring it moves freely. Apply pneumatic oil if recommended. Then, reinsert the cylinder into the gun body, aligned with the guide rails or locating pins.
【Extended reading: 6 Truths About Aftermarket Air Stapler Parts and Air Nailer Parts】
Maintenance Tips to Extend the Lifespan of Your Air Nailer
 Proper maintenance plays a crucial role in minimizing downtime and reducing long-term nailer repair costs. Whether you're using your tool daily or occasionally, following these care tips will keep your nailers and staplers in peak condition:
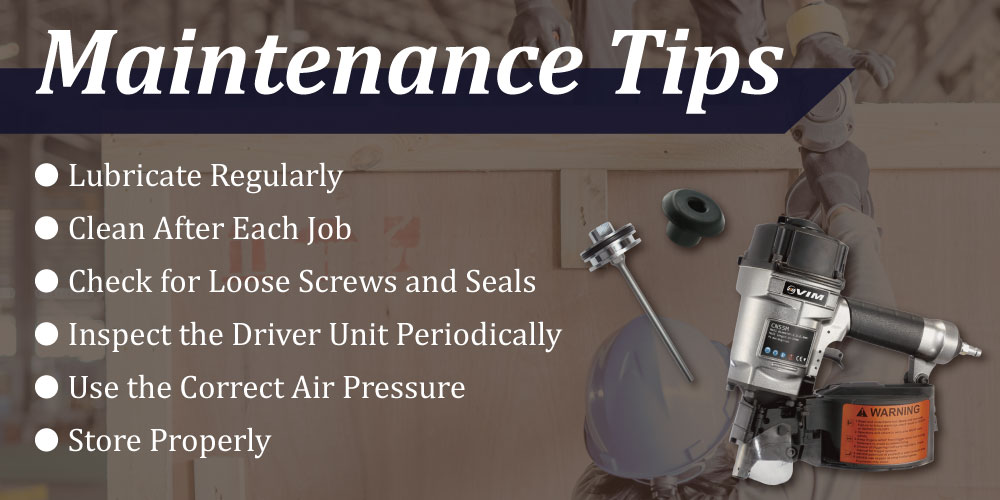
Lubricate Regularly
Add a few drops of pneumatic tool oil to the air inlet before each use. This reduces internal friction and protects critical parts like the driver unit and O-rings from premature wear. Never use automotive oil—it may damage rubber seals.
【Want an easier way to apply pneumatic tool oil? Try our AR250 and AR100 Refillable Spray Cans: Refillable Spray Can: The Future of Sustainable Refilling Solutions】
Clean After Each Job
After each work session, wipe down the tool and clear any debris from the nosepiece and magazine. Built-up dirt can block fastener feeding and eventually lead to misfires or damage to the driver assembly.
Check for Loose Screws and Seals
Vibration during use can loosen cap screws, magazine bolts, or even compromise internal seals. A quick inspection every few days helps prevent air leaks and extends tool performance.
Inspect the Driver Unit Periodically
A worn or bent driver unit can cause nails to misfire or jam, potentially damaging the tool body or fastener channel. Replace damaged parts promptly using compatible driver assemblies for your model.
Use the Correct Air Pressure
Running your air nailer at too high or too low pressure strains internal components. Always follow the PSI guidelines listed in your tool’s manual to avoid piston or valve damage.
Store Properly
After use, disconnect the air hose and store the tool in a clean, dry area. Avoid leaving it in high-humidity environments, which can cause rust on the cylinder or driver assembly.
By implementing these practices, you can significantly extend the service life of your air-powered tools and avoid frequent nailer repair calls. Preventive maintenance not only saves time—it also ensures your nailers and staplers continue performing with precision and power.
Conclusion
Replacing a worn driver unit is a practical and cost-effective solution to restore firing consistency and prolong the lifespan of your nailers and staplers. By following a structured replacement process and keeping up with regular maintenance, you can avoid costly downtime and ensure safe, efficient operation across job sites or workshops.
At VIM, we supply high-quality driver assemblies and repair parts trusted by professionals worldwide. Whether you're maintaining a single unit or managing a fleet of tools, we’ve got you covered with fast shipping, model-specific support, and expert guidance.
Browse our driver unit selection today or contact our team to get a quote tailored to your tool model!

Article Classification
Recent Articles
- Nailer Parts Guide: How to Ensure Compatibility and Avoid Costly Mistakes
- The Most Popular Driver Assemblies: How to Choose and Where to Get Them
- The 2 Leading Nail Gun Bumper Materials You Don’t Want to Overlook
- Maximize Tool Performance: 4 Smart Ways to Pick the Best Air Tool Fittings
- What Happens When a Driver Blade Fails? Lessons from the Paslode 901078