
INSIGHT

7 Air Nailer Safety and Setup Points You Cannot Afford to Miss
July 01,2026

Swinging a hammer all day leads to sore wrists, split wood, and uneven nail heads. Upgrading to a pneumatic nailer changes everything, delivering flush, professional results in milliseconds. But switching to compressed air means managing more than just a trigger—you need to know how the whole system connects.
Here is a breakdown of how an air nailer works, which nail gauges fit your specific jobs, the exact compressor specs you need, and the safety steps to follow before every project. We have also included a quick FAQ at the end to troubleshoot common operational issues.
What is an Air Nailer? The Power in Your Hands
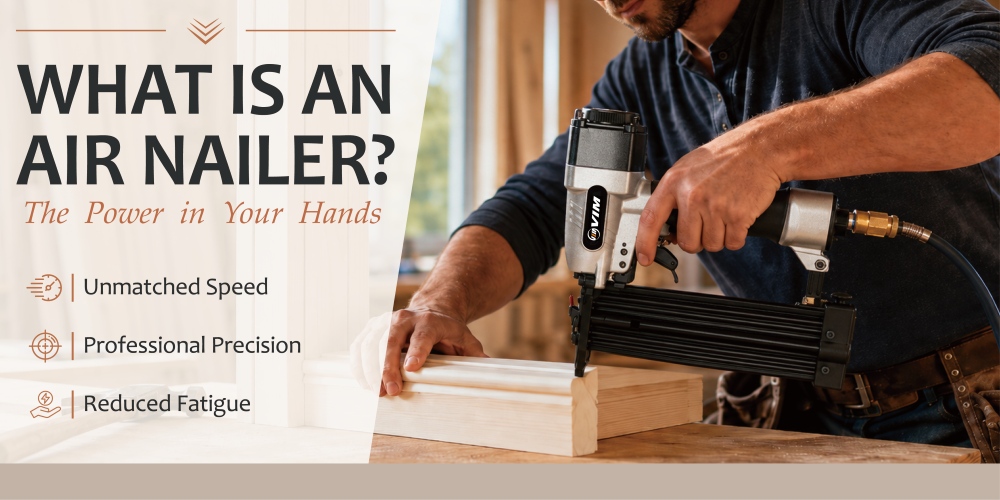
The true value of an air nailer lies in its ability to deliver flawless results in less time. By upgrading to a pneumatic nailer, you achieve professional precision while significantly reducing working fatigue.
The Evolution of Woodworking
Gone are the days of manual hammering, sore thumbs, and uneven finishes. While the traditional hammer has its place, the efficiency of pneumatic power has redefined modern construction. Transitioning to an air nailer means trading physical exhaustion for streamlined, mechanical precision.
Defining the Pneumatic Nailer
An air nailer (also known as a pneumatic nailer) is a high-performance tool powered by compressed air. Linked to an air compressor via a hose, it utilizes a pressurized burst to drive fasteners into various materials instantly. Because they rely on a constant air supply rather than heavy batteries, these tools are famously durable and offer a superior power-to-weight ratio.
【Extended reading: All You Need to Know to Choose Your Perfect Air Nailers, Air Staple Guns, and Air Pliers】
The "Why": Why Switch to Pneumatic Power?
Professional contractors and hobbyists alike rely on the pneumatic nailer for three primary reasons:
- Unmatched Speed
What takes minutes with a hammer takes seconds with an air nailer, allowing you to fly through framing, roofing, or trim work. - Professional Precision
These tools ensure every nail is driven to a consistent depth, preventing surface damage and ensuring a flush, clean finish every time. - Reduced Fatigue
By removing the repetitive, high-impact motion of swinging a hammer, you significantly reduce the strain on your joints, allowing for longer work sessions with less physical toll.
How Does an Air Nailer Work?
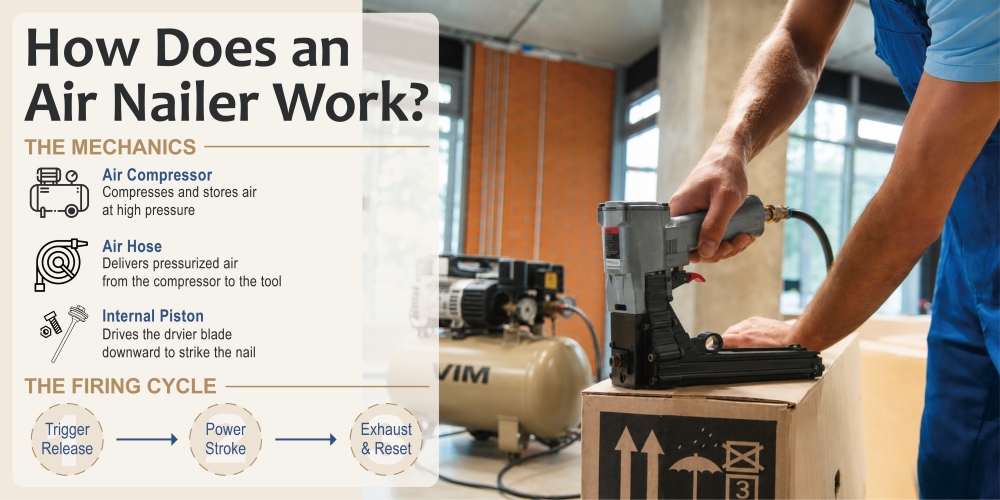
An air nailer (or pneumatic nailer) is a highly efficient power tool that replaces manual hammering by using compressed air to drive nails into wood or other materials in milliseconds.
The Mechanics
The operation of an air nailer relies on a seamless relationship between three main components:
- Air Compressor
The power source that compresses and stores air at high pressure. - Air Hose
The delivery line that safely transports this pressurized air from the compressor to the tool. - Internal Piston
The moving core inside the pneumatic nailer. It reacts to pressure changes and drives the blade down to strike the nail.
【Extended reading: Air Nailer Troubles? 6 Trigger Issues and How to Fix Them】
The Firing Cycle
When the tool is pressed against a surface and the trigger is pulled, it completes a rapid step-by-step cycle:
- The Trigger Release
Pulling the trigger opens an internal valve, creating a sudden pressure imbalance inside the cylinder. - The Power Stroke
High-pressure air rushes into the top chamber, forcing the piston and driver blade downward with intense speed to shoot the nail. - The Exhaust & Reset
The used air is exhausted through vents, the piston returns to its top position, and a new nail is fed into the chamber for the next shot.
【Extended reading: Nail Gun Leaking Air from Trigger? Step-by-Step Fix & Prevention】
【Extended reading: What Is Driver Blade? Accomplished Knowledge in Original vs. Aftermarket! 】
Most Commonly Used Air Nailers for Beginners
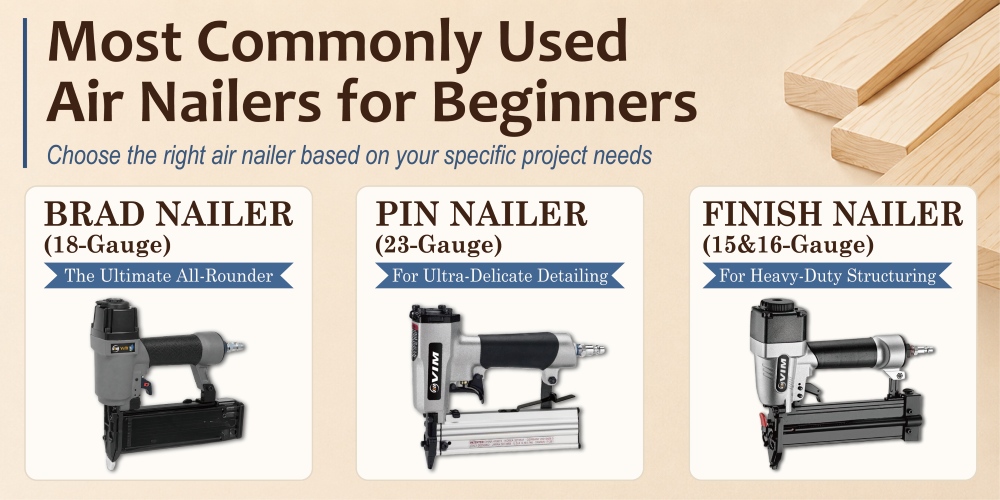
Walking into the world of pneumatic tools can feel overwhelming with all the different gauge numbers and sizes. However, choosing the right air nailer doesn't have to be complicated when you focus on your specific project needs. To help you self-identify the perfect match, we have broken down the most popular choices for beginners based on their everyday use cases.
Brad Nailers (18-Gauge): The Ultimate "All-Rounder"
- Best For
Light trim, window casings, picture frames, and everyday DIY projects like birdhouses. - Why It Fits You
If you are a beginner buying your very first pneumatic tool, start here. It is the most popular choice because it strikes the perfect balance—providing reliable holding power without splitting delicate wood or leaving large holes.
Pin Nailers (23-Gauge): For Ultra-Delicate Detailing
- Best For
Intricate crafts, tiny moldings, or holding glued joints together while they dry. - Why It Fits You
Look into this option if an 18-gauge brad is still too big for your project. It fires micro-pins as thin as a sewing needle, leaving virtually invisible holes that require zero wood putty or sanding afterward.
【Extended reading: Are You Confusing Pins and Brad Nails? Here's How to Tell Them Apart】
【Extended reading: Air Pinner Buying Guide - 6 Points to Distinguish Air Pinner and Finishing Nailer】
Finish Nailers (15 or 16-Gauge): For Heavy-Duty Structuring
- Best For
Installing thick baseboards, crown molding, stair railings, and sturdy cabinetry. - Why It Fits You
Move up to this tool when your project involves thick, heavy wood that needs extra holding power. These thicker nails drive deep into dense materials, ensuring your heavy-duty woodworking stays securely anchored.
【Extended reading: 5 Reasons Why VIM Concrete T Nails Deliver Unmatched Grip and Durability】
【Extended reading: 8 Expert Facts on Strip Nails for Smarter Fastening Choices】
Essential Components Checklist
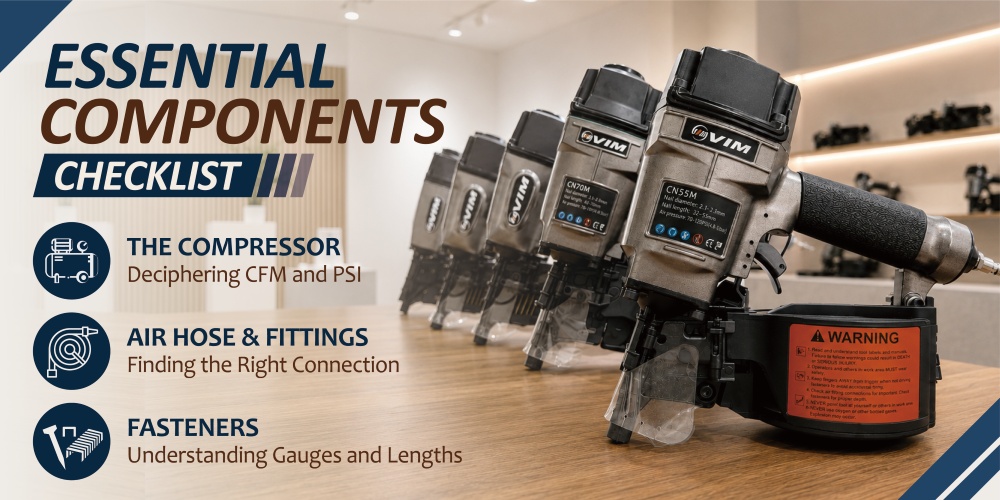
Buying an air nailer is only the first step toward upgrading your workshop. To get the tool running, you need a complete, compatible system that delivers the right power and air supply safely. This essential checklist breaks down the core components you need to set up your pneumatic nailer and explains the technical specs in plain English.
The Compressor: Deciphering CFM and PSI
- What It Means
The air compressor is the engine of your entire setup. For beginners, the two most critical metrics to look at are PSI (Pounds per Square Inch), which measures the driving force or pressure of the air, and CFM (Cubic Feet per Minute), which measures the volume of air delivered. - The Beginner’s Guide
Most DIY pneumatic nailers require around 70 to 120 PSI to drive fasteners perfectly flush. Since nail guns use quick bursts of air rather than a continuous flow, you don't need a massive, industrial compressor—a standard 2 to 6-gallon pancake compressor is usually more than enough to keep your project moving smoothly.
【Extended reading: How Proper Air Pressure Safeguards Your Pneumatic Tools and Investment】
Air Hose & Fittings: Finding the Right Connection
- Diameter & Material
The air hose carries the power from the compressor to your tool. For beginner setups, a 1/4-inch inner diameter (ID) hose is the standard. When it comes to materials, you will generally choose between PVC and Hybrid (Rubber/PVC blend). - The Beginner’s Guide
While PVC hoses are budget-friendly and lightweight, they tend to become stiff and coiled in colder weather. We highly recommend investing in a Hybrid hose; it stays incredibly flexible, lies flat on your workshop floor without twisting, and makes maneuvering your air nailer much easier and safer.
【Extended reading: Maximize Tool Performance: 4 Smart Ways to Pick the Best Air Tool Fittings】
Fasteners: Understanding Gauges and Lengths
- What It Means
Fasteners are the specific nails or pins your gun fires. They are categorized by Length (how deep they go) and Gauge (the thickness of the wire). It is crucial to remember that with gauges, the higher the number, the thinner the nail. - The Beginner’s Guide
Always check your tool’s manual before buying ammunition. An 18-gauge brad gun can only shoot 18-gauge fasteners, but it can usually accept a variety of lengths (e.g., from 5/8 inch to 2 inches). Matching both the precise gauge and the correct length to your tool ensures flawless operation and prevents frustrating jams.
【Extended reading: Not Sure Which Gauge to Use? These 4 Points Make It Easy】
【Extended reading: Make Every Connection Count: 4 Clear Strategies to Choose the Best Fastener Materials】
Step-by-Step: How to Use an Air Nailer Safely
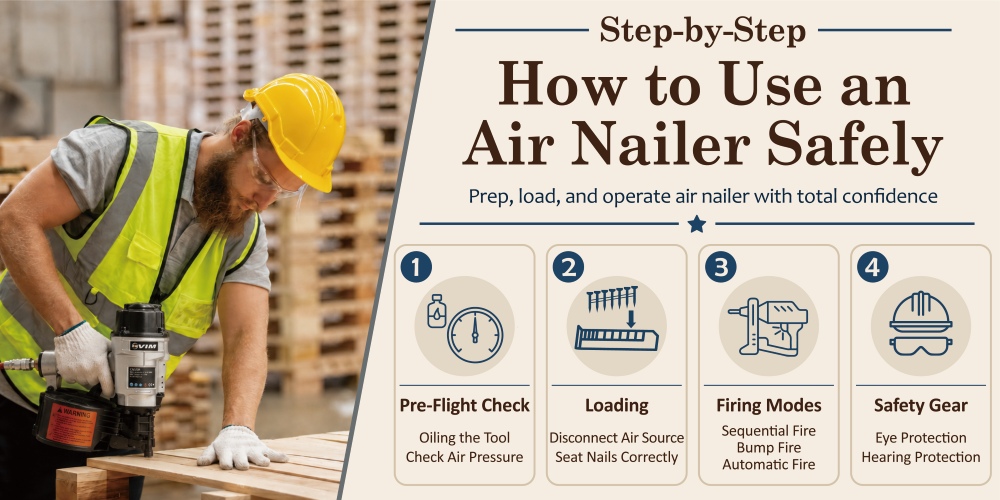
A pneumatic nailer saves hours of manual labor, but its immense power requires a strict safety mindset. Whether you are a pro or a DIYer, following a proper step-by-step approach ensures your project goes smoothly without accidents. Here is how to prep, load, and operate your air nailer with total confidence.
1. Pre-Flight Check: Inspecting Your Tool
Before you even think about plugging in the air hose, a quick inspection is vital:
- Oiling the Tool
Skip this if your pneumatic nailer is labeled "oil-free." For traditional models, add 2–3 drops of specialized air tool oil into the air inlet before high-volume projects. If used occasionally, lubricating every few weeks or every 1,000 shots is enough to prevent the tool from spitting excess oil. - Checking Air Pressure
Look at your compressor’s regulator. Ensure the PSI (pounds per square inch) matches the manufacturer's recommended settings for your specific air nailer. Too low, and the nails won't sink; too high, and you risk damaging the tool or the workpiece.
2. Loading: Seating the Nails Correctly
Loading a nail gun requires a steady hand and a strict safety mindset:
- Disconnect the Air Source
Always disconnect the air hose before loading fasteners to prevent accidental discharge. - Seat the Nails
Insert the nail strip into the magazine. Ensure they are facing the correct direction (points forward/down) and slide them forward until they click or lock into place smoothly. Never force a jammed strip.
【Extended reading: 3 Common Magazine Issues in Air Nailers and How to Fix Them】
3. Firing Modes: Choosing the Right Trigger Style
Understanding how your air nailer releases fasteners is crucial for keeping control over your work. Depending on the model, most pneumatic nailers utilize one of these three primary firing modes:
- Sequential Fire (Precision & Safety)
This mode requires you to depress the safety nose piece against the wood before pulling the trigger to fire a single nail. It provides maximum accuracy and is the safest method for finish carpentry. - Bump Fire (Speed & Volume)
Also known as contact actuation, you hold the trigger down and flash-fire a nail every time the tool bumps the wood. It is exceptionally fast for high-volume jobs like framing or roofing. - Automatic Fire (Continuous Production)
Common in heavy-duty industrial pneumatic staplers and nailers, this operates like a machine gun. Holding the trigger down allows continuous, rapid-fire action—ideal for fast-paced assembly lines, pallet manufacturing, or furniture upholstery.
【Extended reading: The All-in-One Reference for 4 Firing Modes in Pneumatic Tools】
4. Safety Gear: The Non-Negotiables
Never squeeze the trigger without your personal protective equipment (PPE). These are absolute must-haves:
- Eye Protection
High-impact, ANSI-approved safety glasses are mandatory. Deflected nails, wood splinters, and flying debris are common hazards. - Hearing Protection
A pneumatic nailer produces a sharp, loud exhaust pop. Protect your hearing with quality earplugs or earmuffs, especially when working in enclosed indoor spaces.
【Extended reading: Safety Starts Here: Explore 5 Smart Safety Designs in Pneumatic Nailers and Staplers】
FAQ
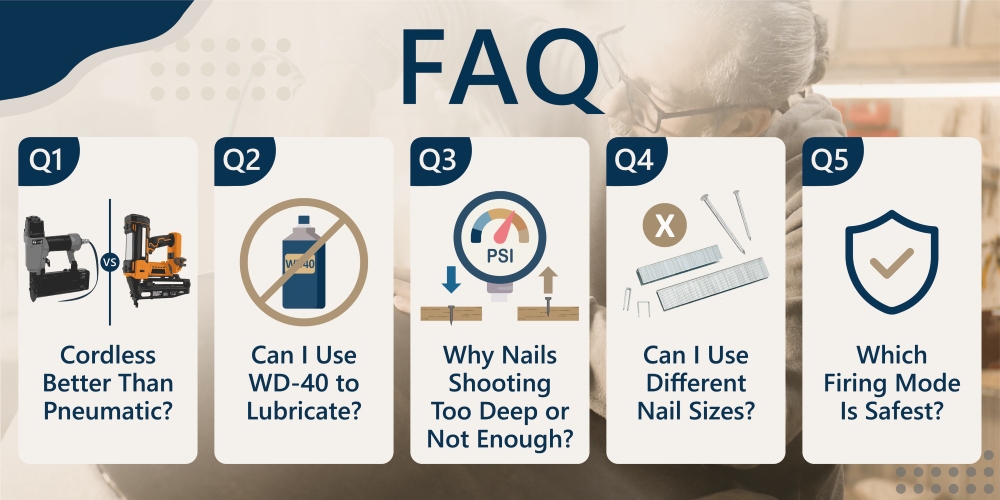
Q1: Is a Cordless Nailer Better Than a Pneumatic Nailer?
A1: Not necessarily. A pneumatic nailer is lighter, more durable, and provides consistent power without waiting for a battery to charge. However, it does require an air compressor and hose.
Q2: Can I Use WD-40 to Lubricate My Air Nailer?
A2: No. Never use WD-40 or motor oil; they destroy the internal rubber O-rings. Always use specialized air tool oil for a traditional air nailer (and skip it entirely if labeled "oil-free").
Q3: Why Is My Air Nailer Shooting Nails Too Deep or Not Deep Enough?
A3: This is an air pressure issue. Check your compressor's regulator: if the nails sink too deep, your PSI is too high; if they stick out, your PSI is too low.
Q4: Can I Use Different Nail Sizes in The Same Pneumatic Nailer?
A4: Generally no; most pneumatic nailers are designed for one specific gauge. However, some specialized 2-in-1 air nailers on the market can switch between different fastener types (like brads and staples). Always check your tool's manual for compatibility.
Q5: Which Firing Mode Is Safest for Beginners?
A5: Sequential Fire mode is the safest. It prevents accidental double-fires and offers the precision needed for beginner DIY projects, unlike the fast but risky bump fire mode.
Conclusion
A pneumatic nailer provides the speed and consistent depth needed for clean, efficient wood assembly. Achieving reliable performance relies on maintaining the proper air pressure, utilizing correct fasteners, and following standard safety checks. A correct system setup ensures consistent output, reduces work fatigue, and extends the lifespan of your tool.
As a dedicated manufacturer of professional pneumatic tools, we specialize in high-durability solutions built for heavy production lines and professional workshops. Our air nailers and aftermarket spare parts, including precision driver assemblies and bumpers, are engineered to deliver maximum wear resistance and zero downtime. Contact us today to explore our full product catalog and request a competitive quote for your business.
Get Started with VIM Today
Enhance your repairing program with VIM’s reliable parts and exceptional customer service. Visit VIM's website or contact us directly to learn more about our offerings and how we can support your projects.
Article Classification
Recent Articles
- Coil Nailer vs. Strip Nailer: Which One Is Right for Your Job?
- How to Extend Your Air Nailer’s Lifespan Across 3 Key Dimensions
- 7 Air Nailer Safety and Setup Points You Cannot Afford to Miss
- How Proper Air Pressure Safeguards Your Pneumatic Tools and Investment
- Pneumatic vs. Electric Nailer: How to Choose the Best Option for Your Workflow